As we quickly approach November, now is the time to be considering your property’s winter preparations. When it comes to your asphalt, there are several important steps to take to make sure your pavement is ready for the winter months. For example- inspection, drainage, repairs, striping, cleanup, and blacktop sealer.
Step 1:
Inspection –
Prior to any seasonality change, it is important to inspect your pavement for any imperfections and potential repair needs. By taking the time to either do this yourself, or have a professional closely inspect your asphalt, you can prevent serious problems from occurring. As we’ve mentioned before, big cracks and potholes often begin with tiny defects that may not even be noticeable to the untrained eye. Winter is extremely harsh on all exterior elements, and that’s why going into it prepared can have a huge payoff.
Step 2:
Drainage –
The right drainage for your pavement is essential during all seasons, but especially in winter as water damage risks are much higher with snow and ice. Extended exposure to snow piles already increases your chances of damages and extra cracking, but once melted, if your parking lot does not have the correct drainage, this could lead to extreme pooling and flooding. As we’ve said before, water is the most damaging element to your asphalt. Because of this, you want to make sure that your drainage system is set up properly, prior to winter, where excess moisture will wreck havoc.
Your basins should also be inspected before winter. Standing water around the basins can cause erosion along the foundation walls underneath leading to collapse. These areas can also be major “slip and fall” zones in the winter, which means increased liability. If you suspect your drainage is not setup to adequately channel water, a professional paving company, like EastCoat Pavement Services, can help you find a solution that makes sense.
Step 3:
Repairs –
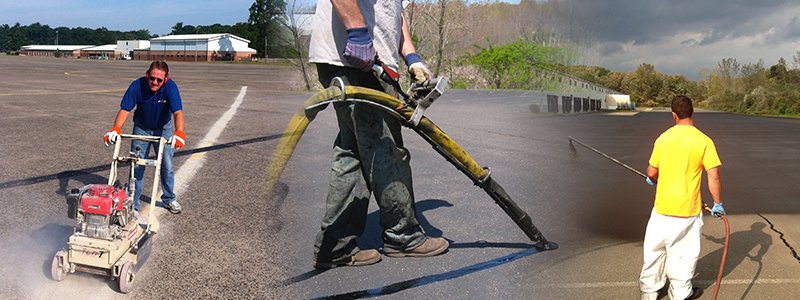
 Now that the inspecting stages are complete, it is time for the repairs. Crack filling should be the number one asphalt pavement maintenance item on your “winterization” to-do list. Cracks are the leading culprit in base deterioration, because if not repaired, water at the surface can penetrate to the base, leading to base failure. Base failure leads to your asphalt failing and needing to be replaced completely, which likely could have been avoided with maintenance like crack filling. Cracks can range from very large in size to nearly invisible.
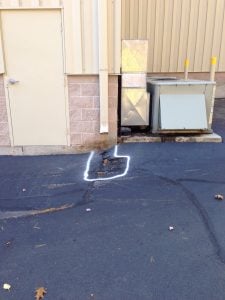
For larger asphalt deficits, like pot holes, patching using the saw cut and patch method is very effective. This involves cutting and removing the areas of deterioration, and refilling them with new hot mix asphalt. There are also other patching methods, which can be found in our blog Pothole Repair: 3 Basic Patching Methods. Potholes are generally seen more often following winter, due to the expanding and contracting of pavement, mixed with the freezing and melting of water that occurs. See more on how, and why potholes form in our blog Asphalt Pothole Repair: Potholes Explained. It is important to understand that existing potholes and tripping hazards will get worse over winter, and frost heave can also occur.
Step 4:
Cleanup –
A good cleaning of your pavement prior to winter is a great way to avoid adding avoidable challenges to an already challenging season. Getting rid of unnecessary items laying on your pavement, and giving it one last good clean, will help prepare the surface for the first snow. And more importantly, the plowing that comes with it. You want to also clear broken pieces of asphalt and/or curbing before plowing season. If you don’t, plows will likely drag the broken pieces around leaving remanence all over the parking lot, and potentially leading to more breakage/damages.
Step 5:
 Repainting your parking lot stripes –
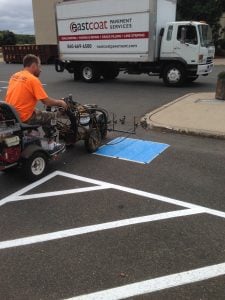
This many not seem like your typical winter maintenance, but it should be on your list. Line striping in the fall season helps to ensure that your lot is safe for everyone this winter. Freshly painted traffic guidelines, crosswalks, and parking spaces will stand out better than warn out paint once the snow starts falling.
Step 6:
Blacktop Sealer –
While blacktop sealer is not necessary or required in all situations, it can help in prepping your asphalt for winter and bringing it all together. The blacktop sealer can serve as a finishing coat, sealing the entire surface and all other repairs that were made. Sealcoating can also help to seal up the tiny “invisible” cracks, and create a very smooth surface for plows.
The most important thing to consider when planning your asphalt’s winterization to-do list, is the weather. These projects cannot take place in extremely cold temperatures or when there is rain or snow in the air. It is important not to wait until it’s too late. Finding yourself going into winter unprepared, because this could lead to very costly repairs come spring. Another thing to keep in mind is that paving companies work seasonally. Meaning, that if you wait too long, your first choice paver may not have spots left for the season!
Since we’ve had a very unseasonably warm fall thus far, it has allowed for more time to work. But, don’t let that warm weather influence your timeline too much. Because the colder days will be here before you know it! Contact EastCoat Pavement Services today for your free consultation and begin inspecting and preparing your asphalt for the harsh CT winter weather headed our way!
Click Title Box To Close


 Repainting your parking lot stripes –